
Clever Storage Hacks That Actually Work in Real Homes With Limited Space
Kitchen drawers jammed with utensils, bathroom cabinets holding half-used bottles, bedroom closets mixing shoes, bags, and seasonal clothes—this article is a practical guide to clever storage hacks that deal with those exact, ordinary problems. This is not a mindset piece or a full-home overhaul. It’s a how-to guide focused on small, physical storage decisions that reduce overflow and make daily access easier. The scope is intentionally narrow: common household storage zones, limited space, shared use, and the reality of keeping items you still need. Each section handles one location or container type at a time, with clear stopping points so the work doesn’t expand. You can apply one idea and stop without breaking anything else.
Using Drawer Dividers to Stop the Daily Pileup
Kitchen and desk drawers often fail for one simple reason: loose items migrate. Utensils slide, pens roll, batteries tangle with rubber bands. This section is about using drawer dividers as containment tools, not aesthetic upgrades.
Start by emptying one drawer completely and setting the contents on the counter. Wipe the drawer base so nothing sticks or shifts underneath. Before buying anything, sort items into rough use groups: daily tools, occasional tools, and rarely used extras. Anything that doesn’t belong in that drawer goes aside immediately.
Adjustable drawer dividers work best because they let you size compartments to the items you already own. Place dividers so the most frequently used items sit closest to the drawer front. Long items like spatulas or rulers get lengthwise channels. Small items get shallow compartments that prevent stacking.
The key micro-action is this: nothing in the drawer should be able to slide freely when you open it. If it can move, it will eventually pile. Once items are placed, open and close the drawer twice. If something shifts, tighten or reposition the divider.
Stop once the drawer opens smoothly and everything stays visible. You don’t need to organize adjacent drawers right now. One stable drawer is enough for today.
Vertical Storage Hacks for Cabinets That Feel Too Short
Cabinets fail when vertical space is ignored. Plates stack too high, canned goods disappear behind each other, and shelf height stays fixed while items vary. This section covers vertical storage hacks that work inside existing cabinets without remodeling.
Open one cabinet and remove everything from a single shelf. Measure the shelf height using a simple estimate: hand height is enough. If you can stack more than two layers of items, you have unused vertical space.
Shelf risers are the most reliable solution here. Place one riser toward the back of the shelf, creating a second level. Heavier items go underneath; lighter or less-used items go on top. For dishes, everyday plates stay on the lower level, while serving bowls or extra sets move above.
For pantry cabinets, group items by height before placing them back. Tall cereal boxes on one side, short cans on another. Add a riser only where it solves a visibility problem. Avoid filling every inch; the goal is reach, not density.
Close the cabinet door and reopen it. If you can see every category at a glance, stop. You don’t need matching risers everywhere. One improved shelf prevents the entire cabinet from collapsing back into stacks.
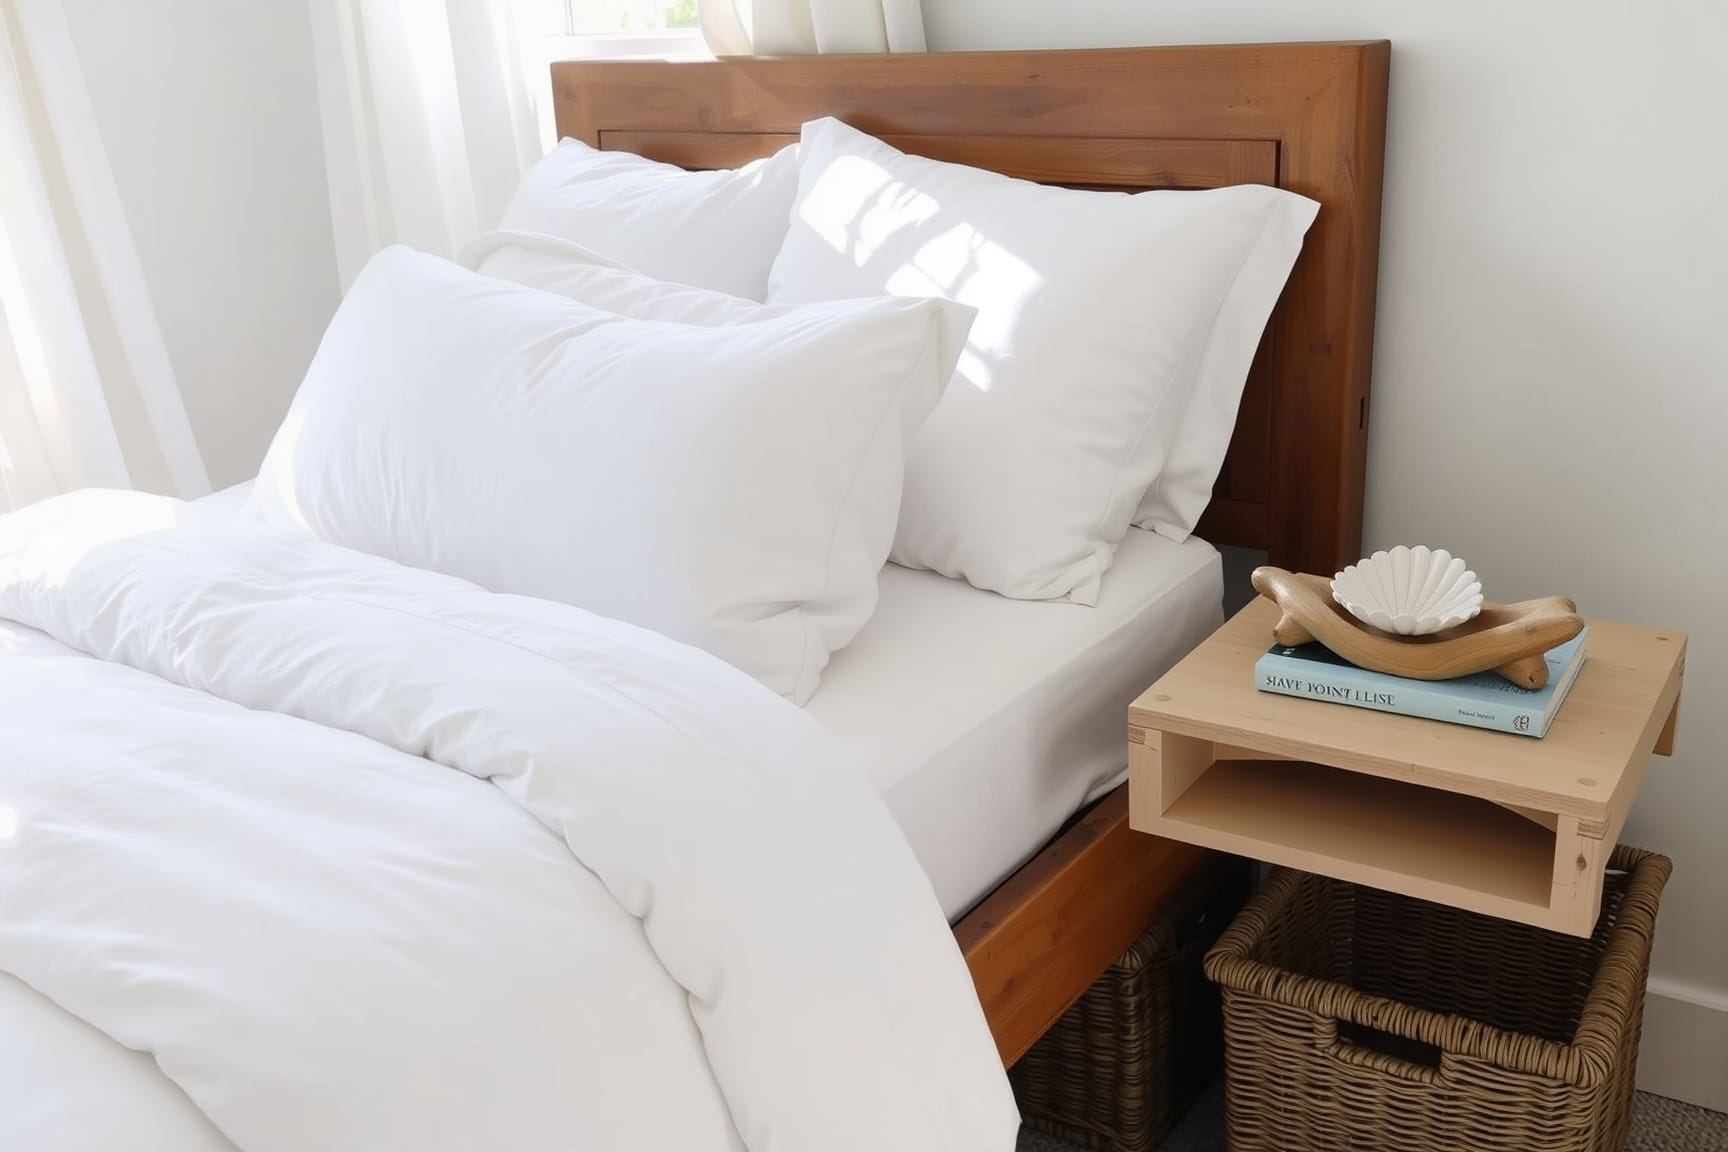
Under-Bed Storage That Doesn’t Turn Into a Black Hole
Under-bed space often becomes a catch-all for things without homes. Shoes, spare linens, seasonal clothes get pushed in and forgotten. This section is about using under-bed storage as controlled overflow, not hidden clutter.
Pull everything out from under the bed and sort it on the floor. Only keep items that are used seasonally or occasionally. Daily items don’t belong here because access is limited.
Choose low-profile bins with solid sides. Fabric bags without structure sag and trap items. Clear bins are best because they eliminate guessing. Labeling is optional if contents are visible.
Assign each bin a single category: off-season clothing, extra bedding, or hobby supplies. Do not mix categories. Place heavier bins closer to the side you access most easily. Lighter bins can go further in.
Before sliding bins back, vacuum or sweep the floor area. This prevents dust buildup that makes retrieval unpleasant later. Slide bins in with labels or clear sides facing outward.
Stop once bins slide smoothly and nothing touches the bed frame. If one bin doesn’t fit cleanly, remove it. Under-bed storage only works when retrieval stays easy.
Door-Back Storage for Items You Grab Every Day
The backs of doors are often unused despite being prime storage zones. This section focuses on door-back storage hacks for items used daily: cleaning supplies, accessories, or pantry goods.
Choose one door: a pantry door, hall closet door, or bathroom door. Measure the door width and height to avoid overcrowding. Over-the-door organizers with adjustable pockets work best because they don’t require drilling.
Assign the organizer to one category only. For example, cleaning sprays and cloths, or hair tools and products. Place heavier items at the bottom to keep the organizer stable.
Load items so labels face outward and nothing overlaps. If pockets bulge, remove items until the door closes easily. Resistance means the system will be avoided.
Open and close the door fully. Listen for scraping or shifting. If it happens, reduce weight or move items to lower pockets.
Stop once the door opens freely and items are visible. Don’t add more just because there’s space. Door-back storage succeeds when it reduces cabinet crowding, not when it becomes another overflow zone.
Clear Bins for Closets That Mix Too Many Categories
Closet shelves often hold mixed piles: bags, folded clothes, accessories, and random boxes. This section explains how clear bins create boundaries without forcing you to downsize immediately.
Start with one shelf. Remove everything and wipe the surface. Group items into broad categories: accessories, folded tops, workout gear, or seasonal items. Keep categories wide to avoid over-sorting.
Choose clear bins sized to the shelf depth. Shallow bins prevent stacking, which is the main cause of collapse. Place one category per bin. If a category overflows, that’s a signal—not a failure.
Position bins so the most-used categories sit at eye level. Less-used bins can go higher or lower. Leave a small gap between bins so they slide in and out without friction.
Before stopping, pull one bin out and put it back. If it catches or tips, adjust the load. Bins should move smoothly with one hand.
Stop once each bin holds one category and shelves look calm rather than full. You don’t need to label or color-code. Visibility and separation are enough for now.

Stackable Storage for Pantries That Won’t Stay Neat
Pantry shelves often collapse because items stack without limits. Bags lean, boxes crush, and smaller items vanish behind larger ones. This section covers clever storage hacks using stackable containers to keep pantry food visible and contained.
Start with one shelf only. Remove everything and group items by type: snacks, baking supplies, canned goods, or breakfast items. Don’t over-separate. Broad groupings hold better over time.
Choose stackable bins with flat, sturdy lids. Avoid flexible sides. Each bin should be light enough to lift when full. Clear bins work best here because you can see quantities without opening anything.
Load bins by weight. Heavier items go on the bottom layer, lighter ones on top. Never stack more than two bins high unless you can lift the top one comfortably. If lifting feels awkward, the stack is too tall.
Face labels or packaging outward inside the bin. This prevents rummaging. Slide bins back onto the shelf leaving a small finger-width gap so they don’t scrape.
Stop once the shelf holds defined stacks that don’t wobble. You don’t need to decant everything or label every bin. Stable stacks that lift cleanly are the win.
Bathroom Storage Hacks for Small, Crowded Cabinets
Bathroom cabinets fill quickly with bottles, backups, and half-used products. This section focuses on storage hacks that create order without forcing you to discard items you still use.
Empty one cabinet or one shelf at a time. Line items up on the counter by type: daily use, occasional use, backups. Anything expired or empty goes out immediately.
Use narrow bins or turntables designed for tight spaces. Turntables work best for bottles because they bring items forward without rearranging. Place daily-use items closest to the front.
Group like items together: hair products in one zone, skincare in another. Avoid mixing categories. Mixing leads to overbuying because items get lost.
If you use bins, keep them shallow. Deep bins encourage stacking, which hides products. One layer per bin keeps everything visible.
Test access before stopping. Reach for your most-used item and put it back. If you have to move something else first, adjust placement.
Stop when you can reach daily items without shifting anything. Backups can sit further back. That separation alone reduces cabinet chaos.
Entryway Storage That Handles Daily Traffic
Entryways collect shoes, bags, mail, and jackets because they’re drop zones. This section covers storage hacks that work with daily movement instead of fighting it.
Focus on one surface: a bench, shelf, or small table. Clear it completely. Decide what actually needs to live here—usually shoes, keys, and one bag per person.
Use trays or low bins to define spots. Shoes go in one defined area, not scattered. Keys get one tray. Bags get hooks or one bin on the floor.
Vertical hooks work better than racks for coats and bags because they separate items visually. Mount hooks at reachable heights for everyone using them.
Limit capacity on purpose. If there are four hooks, only four items belong there. Extras go elsewhere. This prevents pileups from becoming permanent.
Test the setup by coming in and leaving once. Put items down as you normally would. If something doesn’t have a clear place, adjust now.
Stop once the entryway handles one normal day without overflow. You don’t need to store everything here—just what enters and exits daily.
Storage Hacks for Kids’ Items Without Over-Sorting
Kids’ storage fails when systems are too detailed. Toys, school supplies, and clothes move constantly. This section focuses on simple storage that survives regular use.
Pick one category: toys, art supplies, or school gear. Empty that category into one area. Group items loosely by type, not by set.
Use open bins rather than lidded ones. Open bins reduce friction and increase follow-through. Assign one category per bin and keep labels simple or visual.
Place bins at the child’s reach level. High shelves invite dumping. Low access encourages putting things back.
Limit bin size. If a category doesn’t fit, that’s information—not a problem. Either split the category into two bins or reduce volume later.
Return items together with the child once. Show where each category lives. No long explanations needed.
Stop when each category has a single, reachable home. The goal is containment, not perfection.
Clever Storage Hacks for Paper That Isn’t Going Digital
Paper piles build up in kitchens, offices, and counters. This section addresses physical paper storage for people who still receive mail, forms, and documents.
Start with one paper pile only. Gather it and sort into three stacks: action needed, reference, and discard. Discard immediately.
Use vertical file holders or slim trays. Vertical storage keeps paper visible and prevents stacking. Assign one holder per category.
Action papers go in front and stay thin. If the stack grows beyond a few inches, it needs attention—not a bigger container.
Reference papers go behind and should be clearly labeled. Avoid overstuffing. If papers don’t fit, you likely have outdated items.
Place the holder where papers naturally land, not where you wish they would. Location matters more than aesthetics.
Stop once incoming paper has a defined landing spot. You don’t need to file everything today. Containment is enough for now.
Storage Hacks for Laundry Areas That Attract Clutter
Laundry rooms and closets collect clutter fast: loose socks, cleaning products, random bags, and items waiting to be “dealt with later.” This section focuses on storage hacks that keep laundry zones functional, not perfect.
Start with one surface or shelf near the washer. Clear it completely. Sort what was there into four groups: laundry supplies, items needing washing, items needing folding, and items that don’t belong here.
Install or use wall-mounted shelves or narrow carts if available. Vertical space matters more than floor space in laundry areas. Place detergents and cleaning supplies together in a handled bin so they can be moved easily.
Add one small bin or basket labeled mentally as “in transit.” This is for items pulled from pockets or found during laundry. It prevents scattering without demanding immediate decisions.
Hooks work well for mesh bags, lint rollers, or reusable grocery bags. Hanging keeps them visible and off surfaces.
Before stopping, run one normal load of laundry using the setup. Notice what lands on the counter. Adjust storage to match that behavior.
Stop once surfaces stay mostly clear through one laundry cycle. That’s enough to stabilize the space.
Clever Storage Hacks for Fridge Shelves That Disappear Food
Fridge clutter isn’t about volume—it’s about visibility. Food gets pushed back, forgotten, and replaced. This section addresses storage hacks that make everything easy to see without reorganizing constantly.
Choose one fridge shelf. Remove everything and wipe it clean. Group items by type: condiments, leftovers, drinks, produce containers.
Use clear bins with low sides. Tall bins block sightlines. Assign one category per bin and avoid mixing. Leftovers deserve their own bin to prevent mystery containers.
Place bins so nothing hides behind them. If the shelf depth is deep, leave space at the back rather than filling it. Empty space preserves visibility.
Keep the front edge of the shelf for items used daily. Items used less often can sit slightly behind but still visible.
Test by opening the fridge and scanning for what you need. If you spot it instantly, the system works.
Stop once food stays visible for a few days. You don’t need to label or decant. Seeing what you already have reduces overbuying naturally.
Storage Hacks for Shared Closets Without Territory Battles
Shared closets fail when boundaries are unclear. Clothes overlap, shelves blur, and no one knows what belongs where. This section focuses on storage hacks that create quiet separation.
Pick one shared zone: a shelf, drawer bank, or hanging section. Empty it completely. Divide the space physically, not emotionally.
Use bins, shelf dividers, or hanging organizers to mark ownership. One person per bin or section. Clear boundaries matter more than equal space.
Avoid mixing categories across people. For example, both partners’ sweaters shouldn’t share one shelf. That’s where creep happens.
Place most-used items at reachable height for each person. Less-used items can go higher or lower without conflict.
Before stopping, both users put items back themselves. This ensures the layout makes sense in real use.
Stop once each person has a defined zone that doesn’t require negotiation. You don’t need to rebalance or optimize further right now.
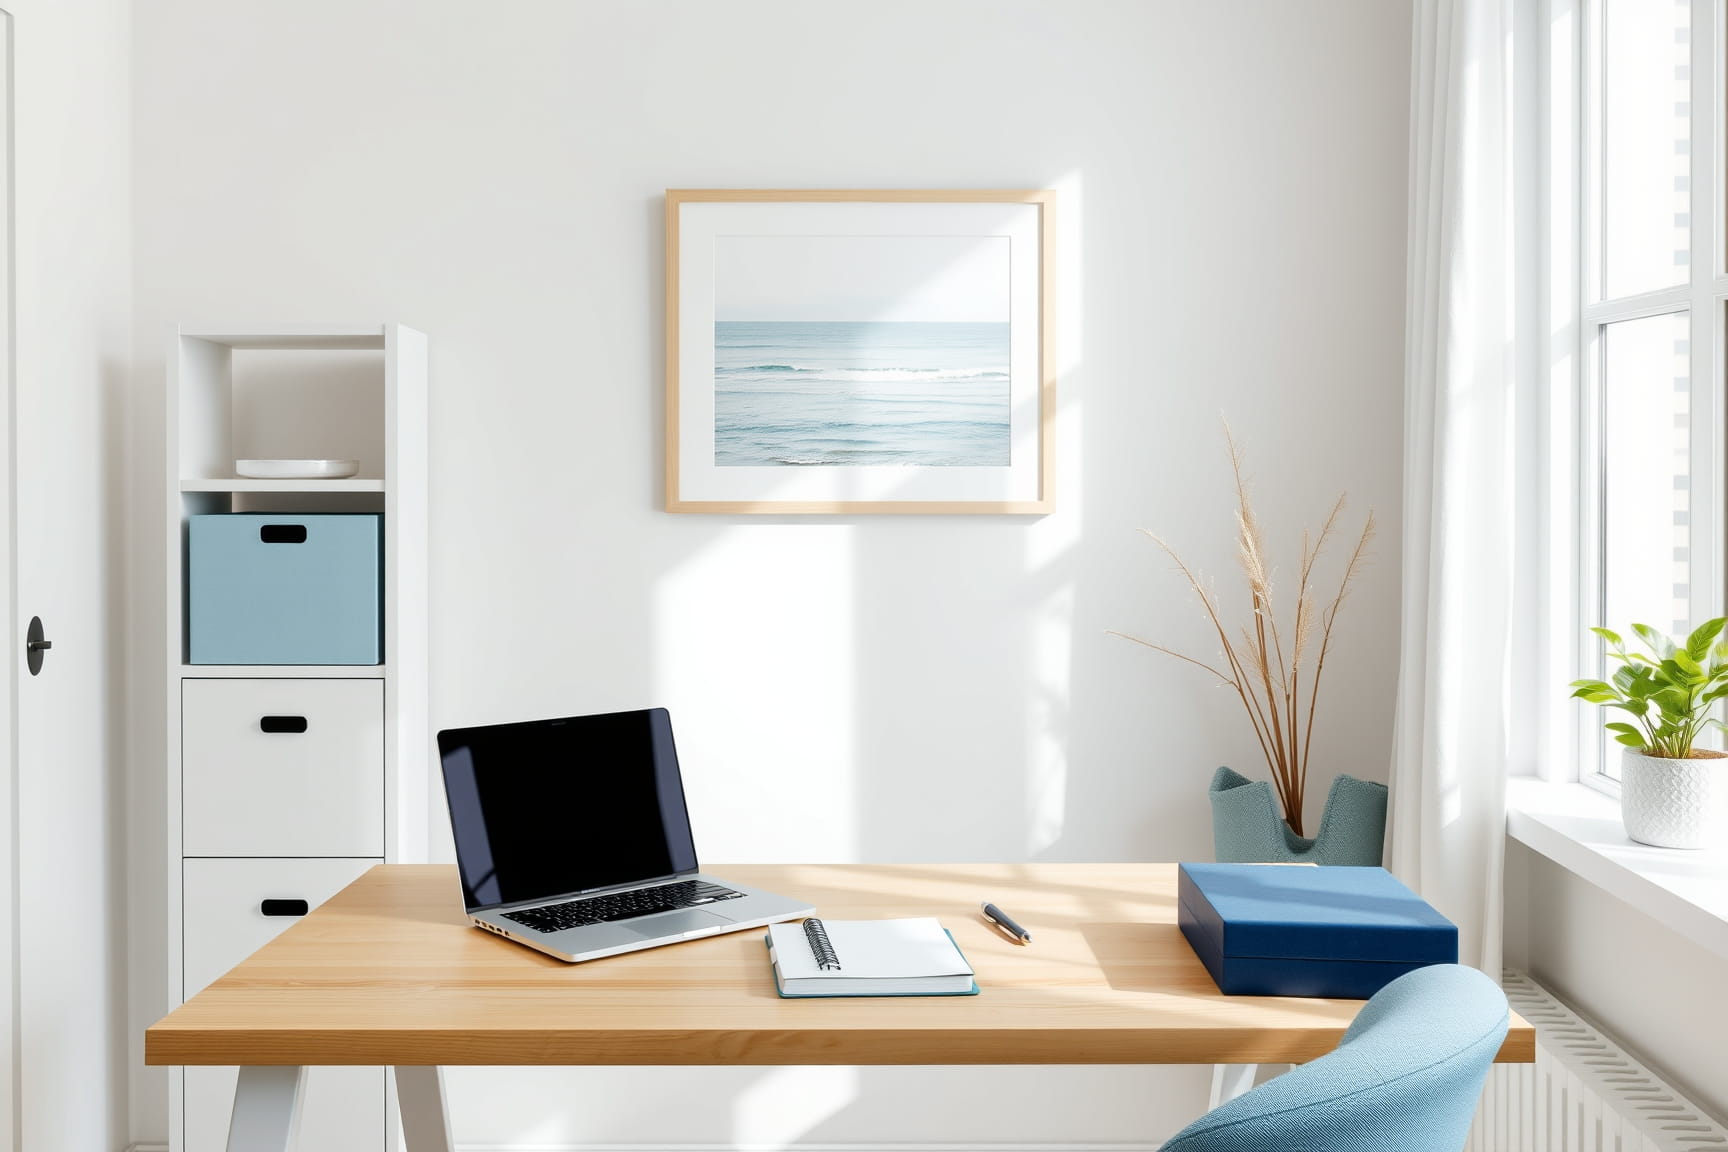
Storage Hacks for Small Offices With No Real Storage
Home offices often lack built-in storage, leading to stacked papers, supplies, and cables. This section covers clever storage hacks that work in tight workspaces.
Start with the desk surface. Clear everything except the computer. Sort items into tools you use daily and tools you use occasionally.
Use vertical file holders or wall-mounted pockets for daily papers and notebooks. Keeping them upright saves space and keeps them visible.
Drawer units or rolling carts work well for occasional supplies. Assign one drawer per category: tech, stationery, reference materials.
Cable clutter gets its own small bin or box. Coil cables loosely and keep them contained. Loose cables create visual noise fast.
Test by working for 30 minutes. Notice what you reach for. Adjust placement so those items stay closest.
Stop once the desk surface stays mostly clear during normal work. A calm surface is the primary goal.
Clever Storage Hacks for Random Items With No Category
Every home has a group of items that don’t fit anywhere: flashlights, spare hardware, manuals, small tools. This section addresses storage hacks for those “miscellaneous” items without endless sorting.
Gather these items into one pile. Don’t overthink categories. Group loosely by function: tools, instructions, household odds.
Choose one bin or box per group. Clear bins are best, but any sturdy container works. Avoid mixing unrelated items.
Store these bins in one consistent location: a utility shelf, closet floor, or garage shelf. Consistency matters more than proximity.
Label only if needed. If you can see what’s inside, labels are optional.
Before stopping, retrieve one item and put it back. If it feels annoying, the bin is too full or too far away.
Stop once miscellaneous items live in one predictable place. You’ve reduced searching—that’s the win.