
Home Donation Station: A Practical Way to Contain Outgoing Items Without Letting Them Take Over

Paper bags leaning against a wall, a reusable tote half-filled with clothes, a box on the floor holding books you meant to drop off weeks ago. These are the objects this article deals with. This is a practical, step-by-step guide to setting up a home donation station that holds items you’ve already decided to give away, without letting those items spread into hallways, closets, or corners of rooms.
The scope here is narrow on purpose. This guide covers where a home donation station lives, what physically belongs in it, and how to keep it from turning into another stalled pile. It does not cover deciding what to donate, organizing your entire home, or researching charities. Those are separate tasks and not required to set this up.
This approach assumes common constraints: limited space, limited time, shared households, and low tolerance for extra steps. The goal is containment, not perfection. One defined spot. One clear purpose.
A home donation station is not storage and not a staging area for sorting later. It is a temporary holding zone for items that are already leaving your home. When it works, it reduces visual noise and mental backtracking. When it’s vague, it becomes clutter again.
Everything that follows focuses on keeping this station physically small, clearly defined, and easy to empty so it does its job and then gets out of the way.
Choosing a Location That Doesn’t Create a New Mess
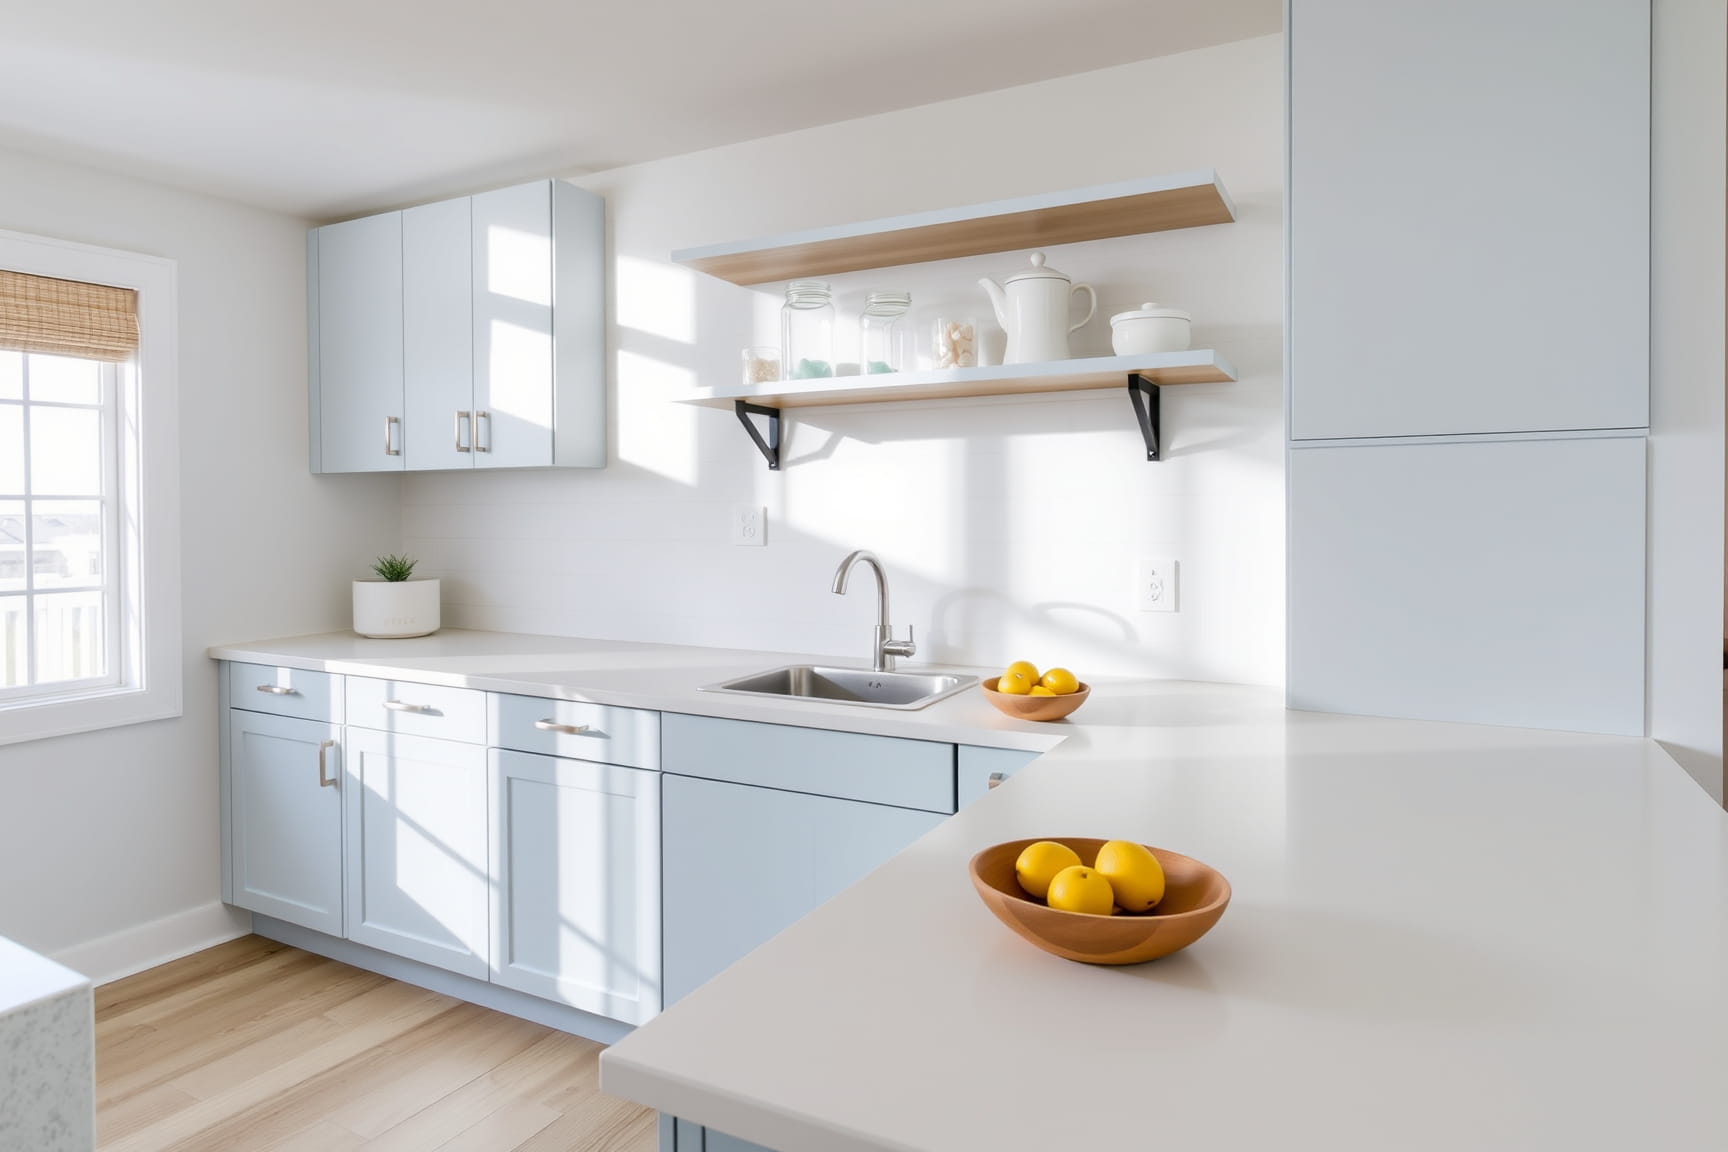
A home donation station works best when it lives near the exit items will eventually leave from. Common options include the inside of a coat closet, the corner of a mudroom, a spot near the garage door, or a low-traffic area by the front door. The key is that the location already supports movement out of the house.
Avoid placing the station in bedrooms, offices, or storage rooms. Those spaces encourage forgetting. If you can close a door on it and not see it for weeks, the station will quietly turn into a backlog.
Choose a location with a physical boundary. A floor corner with no container is not enough. A shelf, a hook, or a clearly defined footprint on the floor gives the station edges. Edges prevent spread.
If space is tight, vertical beats horizontal. A hanging bag on a hook, a lidded bin that fits under a bench, or a box that slides into a closet corner keeps the station from blocking walkways.
Shared households need visibility without intrusion. Pick a spot everyone passes but no one trips over. This reduces questions like “Are we still donating this?” and prevents items from being reclaimed unintentionally.
The right location feels slightly inconvenient to ignore but not disruptive to daily routines. That balance keeps items moving through instead of settling in.
Selecting the Right Container and Keeping It Boring
The container for a home donation station should be sturdy, portable, and visually uninteresting. Laundry baskets, reusable shopping bags, medium cardboard boxes, or simple plastic bins all work. Decorative baskets tend to overstay their welcome and invite overfilling.
Size matters more than style. Choose a container that fills in a reasonable amount of time, not one that could hold half a closet. When the container fills, that’s your natural cue to donate. Oversized containers delay action.
Avoid lids that require effort to open. If dropping an item in feels annoying, people will set it next to the container instead. Open-top or soft-sided containers reduce friction.
Labeling is optional but helpful in shared spaces. A simple tag reading “Donate” is enough. This prevents items from being “borrowed” back into circulation or mixed with returns, repairs, or trash.
Do not subdivide the container. No categories. No bags within bags. A home donation station is a single-purpose tool. Complexity increases hesitation.
If you already have multiple donation bags scattered around, consolidate them into one container before choosing a new one. The act of combining piles is part of establishing control.
Once chosen, resist upgrading. A boring container is easier to empty and easier to replace if it wears out.
What Belongs in the Station and What Does Not
Only items that are already decided belong in a home donation station. Clothing you’ve tried on and rejected, books you’ve finished and won’t reread, small household items you no longer use. If you still feel unsure, the item is not ready.
Do not place “maybe” items here. That turns the station into a decision zone, which slows everything down. Decision-making belongs elsewhere and at a different time.
Broken items, recycling, and trash do not belong in the station. Mixing these creates confusion and increases the chance that the entire container stalls because one item needs special handling.
Keep donation criteria simple. Clean, usable, and acceptable to your chosen donation outlet. You do not need to verify guidelines at this stage, but obvious rejects should be handled separately.
Avoid placing paperwork, sentimental items, or high-value items here. Those categories require different decisions and often different destinations.
If an item needs washing, repairing, or sorting before donation, it does not go in the station yet. Create a separate, clearly named spot if needed, or finish that step before adding it.
The station works because it answers one question only: “Is this leaving the house?” If the answer is yes, it goes in. If not, it stays out.
Setting a Clear Emptying Trigger So It Doesn’t Stall
A home donation station needs a clear rule for when it gets emptied. The simplest trigger is fullness. When the container is full, the next errand includes dropping it off. No rearranging, no compressing, no second container.
Time-based triggers also work if they are realistic. For example, emptying the station on the first Saturday of the month or whenever you pass a donation center during regular errands. Pick one rule, not several.
Avoid aspirational triggers like “when I have time” or “when it’s perfectly sorted.” Those keep the station stuck.
If drop-off locations are inconvenient, keep a short list of acceptable alternatives nearby. This could be a car trunk drop, a scheduled pickup, or a friend who collects donations. The list should be finite.
Do not return items from the station back into the house. Once something enters, it should only leave in one direction. This preserves trust in your decisions.
If the station hasn’t been emptied in a long time, shrink it. Replace the container with a smaller one and empty the old contents immediately. Scale resets momentum.
A home donation station succeeds when it empties regularly, even if that means donating less at a time. Consistency matters more than volume.
Integrating the Station Into Daily Routines Without Thinking About It
A home donation station should fit into habits you already have. Shoes come off, coats get hung up, bags get set down. The station lives in that flow so adding an item doesn’t feel like a separate task.
If the station is near a closet, place it at arm height or floor level depending on what you donate most. Clothes and shoes drop easily into floor-level containers. Small household items work better at waist height so they don’t get buried.
The goal is frictionless use. You notice an item you’re done with, you take three steps, and it’s contained. No carrying it across the house. No “I’ll do this later.”
For shared households, make the rule explicit but simple: if something is going in the station, it’s already a yes. No one needs permission. This reduces stalled piles that wait for consensus.
Avoid pairing the station with major decluttering sessions. It’s not a project zone. It’s a pass-through. Items arrive one at a time during normal life.
If you find yourself walking past the station without noticing it, adjust placement slightly. A small shift closer to eye level or traffic flow can make a difference.
The station should feel like part of the house’s infrastructure, not a temporary experiment. When it blends into routines, it quietly does its job.
Preventing the Station From Turning Into Long-Term Storage
The most common failure point of a home donation station is time. Items sit. The container fills. Nothing leaves. To prevent this, the station needs a built-in limit.
The first limit is size. A container that can only hold so much forces action. When it’s full, the system pauses until it’s emptied.
The second limit is clarity. If you start placing unrelated items nearby, stop and reset. Clear the area around the station so it stands alone again.
Do not stack items on top of the container. That’s a signal the station is overloaded. Either empty it or shrink what’s going in.
If you miss a planned drop-off, don’t compensate by adding another bag. That doubles the problem. Keep one container only.
Occasionally reassess placement. If the station is out of sight, it’s easier to ignore. Visibility supports follow-through.
If donation centers are temporarily unavailable, set a hard pause. Stop adding items until the station empties. This protects the boundary.
A stalled station doesn’t mean failure. It means the limit needs tightening. Adjust the container, the trigger, or the location and move on.
Handling Seasonal Surges Without Expanding the Setup
Certain times of year generate more donation volume. Closet changes, holidays, or school transitions can overwhelm a standard home donation station if you let them.
Instead of adding more containers, handle surges in batches. Fill the station, empty it, then continue. This keeps the system intact.
If you expect a short-term increase, temporarily schedule more frequent drop-offs rather than expanding capacity. Frequency beats size.
Avoid creating a “temporary second station.” Those rarely stay temporary and often migrate into other rooms.
If you must stage overflow briefly, keep it in the same location and remove it within a set time frame, ideally within 48 hours. Longer than that and it becomes another pile.
Seasonal items often come with emotional weight. That doesn’t change the rule. If the decision is made, it goes in the station and follows the same exit process.
When the surge passes, return to normal capacity immediately. Resist leaving extra containers “just in case.”
The station’s strength is consistency. Let it absorb volume through repetition, not expansion.
Managing Donations in Small Homes and Apartments
In small homes, a home donation station must earn its footprint. That means minimal space, clear edges, and no overflow.
Vertical solutions work well here. A hanging bag on the back of a door, a slim bin under a console table, or a box that fits exactly into a closet corner can all serve the purpose.
Avoid floor sprawl. Anything that blocks movement will be resented and ignored.
In apartments without easy drop-off access, portability matters even more. Choose a container you can carry comfortably in one trip.
If space is extremely limited, consider a collapsible container that only exists when needed. When empty, it folds away completely.
Shared walls and tight quarters make visual clutter more noticeable. Keep the station visually quiet and contained so it doesn’t feel like constant unfinished business.
Do not store donation items in vehicles long-term unless that vehicle is part of your normal drop-off route. Cars can become forgotten extensions of the house.
A small, reliable station is better than a large, ambitious one. Fit it to the space you actually have.
Knowing When the Station Has Done Enough
A home donation station doesn’t need to be permanent to be useful. In some homes, it’s a long-term fixture. In others, it’s a temporary tool during a period of change.
If donations slow down and the station stays empty, that’s information. You may not need it active all the time.
An empty station for weeks at a time can be folded away or repurposed, knowing you can bring it back easily when needed.
If you notice fewer stray items and quicker decisions, the station has already done its job by reinforcing a clear exit path.
Do not force use to justify its existence. The absence of donations is not a problem.
The value of a home donation station is measured by what it prevents: piles, hesitation, and second-guessing.
When it’s no longer serving that role, it’s fine to pause it.
You can always restart with the same rules when the need returns.

Using a Donation Station to Reduce Re-Cluttering
A home donation station does more than hold items. When it’s visible and used consistently, it changes how objects move through the house. The station creates a clear exit, which reduces the tendency to reshuffle unused items back into drawers, closets, and cabinets.
When there is no defined exit point, unwanted items often get “parked” temporarily. A sweater moves from a chair to a bed to a closet. A kitchen gadget goes from counter to cabinet to basement. The station interrupts that loop.
The key is immediacy. As soon as an item is identified as no longer needed, it leaves its category and goes straight to the station. There is no interim storage step.
This shortens the lifespan of clutter. Items spend less time circulating and less time taking up decision space.
The station also acts as a visual reminder that leaving is an option. Seeing it regularly reinforces the idea that not everything needs to be kept, fixed, or stored.
If you notice items starting to migrate again, check whether the station is accessible and active. A dormant station loses influence.
Used correctly, the donation station reduces the pressure on storage areas. Closets stay calmer because exits are clear. Cabinets don’t refill as quickly.
The result isn’t minimalism. It’s reduced re-cluttering through a reliable, physical off-ramp.
Coordinating the Station With Ongoing Decluttering
A home donation station works best alongside small, ongoing decluttering efforts rather than large, infrequent cleanouts. It supports momentum without requiring extra planning.
When you declutter a single drawer, shelf, or surface, the station is already waiting. There’s no need to create a new pile or decide where donations should go.
This pairing keeps decluttering sessions contained. You handle one area, make decisions, and immediately remove outgoing items from the space.
Avoid using the station as motivation to declutter more than planned. Its job is to receive items, not to expand the scope of your work.
If you declutter in short bursts, the station absorbs items gradually. If you declutter in longer sessions, it fills faster and prompts a drop-off. Both are fine.
The station also reduces the temptation to stop mid-session because you don’t know what to do with donations. That uncertainty is already resolved.
If you’re decluttering with others, the station provides a neutral landing place. No one has to negotiate storage or timing in the moment.
Think of the station as infrastructure. It doesn’t create decluttering, but it supports it quietly and consistently.
Navigating Emotional Hesitation Without Slowing the System
Some items are easy to donate. Others come with hesitation. A home donation station should not become a holding area for unresolved emotions.
If an item still feels heavy, pause it elsewhere. The station is for items you’re done with, not items you’re working through.
This separation protects the station’s clarity. Mixing emotionally charged items with resolved ones slows everything down.
That said, hesitation doesn’t need to be dramatic. Sometimes it’s just unfamiliarity or habit. If you’ve already decided an item can go, trust that decision and place it in the station.
Avoid reopening decisions once items are inside. Reconsideration trains your brain to doubt future choices.
If you find yourself repeatedly pulling items back out, that’s feedback. The decision process needs adjustment, not the station.
The station should feel calm and neutral. It’s not a test of resolve. It’s a container.
Over time, repeated use builds confidence. Decisions get faster because you’ve practiced letting items move on without ceremony.
Emotional ease comes from consistency, not pressure. The station supports that by keeping the process simple and contained.
Teaching Children and Other Household Members How to Use It
A home donation station can work in households with children or multiple adults if the rules are clear and physical.
Explain the station in concrete terms. This is where items go when we’re done with them and they’re leaving the house.
Avoid abstract lessons about generosity or responsibility at the station itself. Keep instructions practical.
For children, define what they can donate independently and what needs a check-in. This prevents misunderstandings and retrieval attempts.
Keep the container reachable. If kids can’t physically use it, items will end up beside it instead.
For adults, agree on the one-way rule. Once an item goes in, it doesn’t come back out unless there’s a clear mistake.
Labeling helps here. A visible “Donate” sign reduces confusion and protects decisions.
If conflicts arise, handle them outside the station. Don’t turn it into a debate zone.
When everyone understands the station’s purpose, it becomes shared infrastructure rather than personal territory.
Clarity reduces friction. The station stays functional because it stays neutral.
Letting the Station Stay Small and Sufficient
It’s tempting to optimize a home donation station over time. Better container, better spot, better system. Most of the time, that’s unnecessary.
If the station is holding items, getting emptied, and not spreading, it’s doing enough.
Resist the urge to add features. No checklists. No multiple bins. No tracking.
Simplicity keeps the station light. The lighter it feels, the more likely it is to be used.
If circumstances change, adjust one variable at a time. Move it, resize it, or change the emptying trigger. Then stop.
A station that feels “unfinished” invites tinkering. A station that feels boring fades into the background, which is ideal.
You don’t need to optimize donation volume or frequency. The goal is containment and follow-through.
If the station occasionally sits empty, that’s fine. If it occasionally fills quickly, that’s fine too.
Its value lies in being available without demanding attention.
When the station stays small and sufficient, it supports the home without becoming another project.